I absolutely love winter. Winter means cosy evenings tucked next to the fire with my book and a hot drink. Winter means the possibility of snow.
However, winter also means that it will be cold. And, if you are like me and you loathe being cold, this pattern for these crochet twisted winter headbands are for you.
They are definitely beginner-friendly and they also work up super quickly.
Check out the video tutorial here!
Materials:
Chunky yarn
6mm crochet hook
Scissors
Darning Needle
Tape Measure (optional)
Stitch Abbreviations:
sl st: slip stitch
dc: double crochet
htr: half treble crochet
Pattern Notes:
This pattern is worked in UK terms (you can find my post explaining the difference between UK and US terms here).
The chain 1 at the beginning of each row does not count as a stitch.
Jump to:
Sizes:
To begin, you need to know how big to make your winter headband. If you can, measure the circumference of your head. You can then crochet as many rows as you need for your required measurements. However, if (like me) you plan on gifting this headband, you can use the standard measurements listed in the table bellow.
A quick tip: I like to crochet until my headband is ever so slightly smaller than the actual head measurement I need. This way, as the headband stretches over time, it won't become too big. I've listed on the table below the length guide for each size.
Size (Child to Adult) | Average Head Circumference | Headband Length |
Baby (0-3 months) | 13-14 inches | 13 inches |
Baby (3-6 months) | 14-16 inches | 13 inches |
Baby (6-12 months) | 16-18 inches | 15 inches |
Toddler (1-3 years) | 18-19 inches | 17.5 inches |
Child/Teen | 19-20 inches | 18.5 inches |
Small Adult | 21-22 inches | 20.5 inches |
Medium Adult | 22-23 inches | 21.5 inches |
Large Adult | 23-24 inches | 22.5 inches |
Yarn Type:
As this is a winter garment, you will definitely want to use a chunky or bulky (weight 5) yarn. I personally love James C. Brett Flutterby Chunky yarn. It is gorgeously soft - which is exactly what you want for a head garment! I also like to use Paintbox chunky yarn.
Method:
Row 1:
Begin by chaining until you have your desired width, plus 1 extra chain (for turning).
Starting in the second chain from your hook, make 1htr in each chain.
At the end, chain 1 and turn your work.

Row 2:
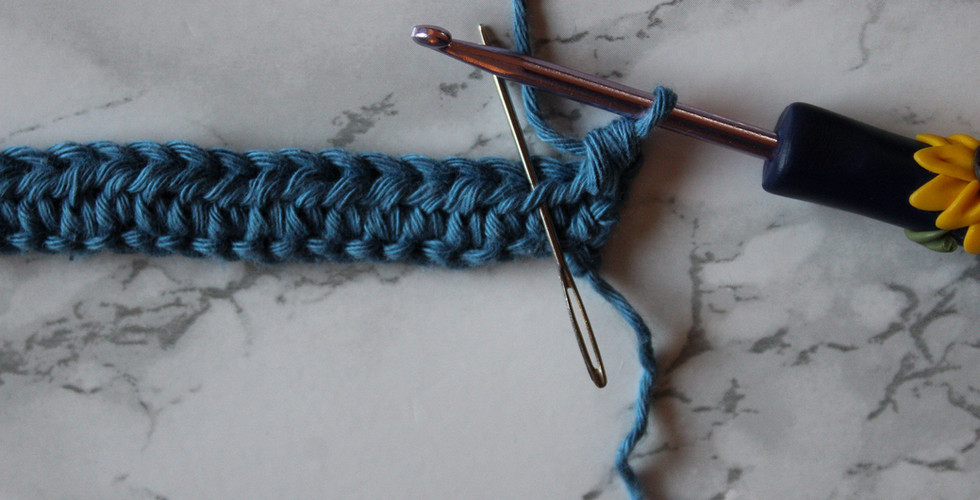
Instead of making 1htr into the two loops at the top of each stitch as normal, we are going to work into the "third loop". To do this, turn your work slightly away from you. You should see a small loop underneath your stitch. This is the "third loop".
Make 1htr into this loop.
Continue to make 1htr into the third loop of each stitch.
At the end, chain 1 and turn your work.
Row 3 and Onwards:
Continue to repeat row 2 until you reach your desired length.
At the end, fasten off and cut your yarn, leaving a long tail end (we will use this to sew our headband closed).
Closing you Headband:
Take your headband and fold the two shorts sides together so that the seams are on the outside. Intertwine them (see below) and, using your tail end, sew down using the whip stitch, making sure you work into each of the layers. At the end, secure with a few knots and weave in any ends.
Now, all you need to do is flip your headband the right way out and it's ready to wear!
If you liked this super quick tutorial, make sure you subscribe to our monthly newsletter so that you never miss out on a new, free crochet pattern!
Don't forget to save this Pin for later!


Comentarios